

Screenshots are one of a blogger's most useful and versatile tools. They can also hold personal memories and records of important events like boss kills, or parties in the beer garden...
There is a lot of screenshot-journaling going on at the moment due to the imminent Cataclysm, an Explorer Task coming up for the BA Shared Topic in a few weeks and also Beru's Make a Memory project, so I'd like to share with you some principles of photography that I find handy when taking screenshots. People have been making images of the world around them for a long long time, and there are plenty of resources around to help you create the most visually pleasing or striking images.
Luckily, taking screenshots in a game takes care of a lot of the technical side of photography for us - we don't need to worry about whether the camera is straight (I have trouble with this IRL!), our exposure, aperture, focus, or different types of lenses. We are only concerned with the size and shape of our screen, and our zoom controls. Post-processing of images can help if your shots come out a little too dark or too light, but most of what makes a WoW screenie great is the composition.
The Basics
How do I...
- take a screenshot?
- On a Windows machine - Press Print Screen. On most keyboards it's located at the top right, next to Scroll Lock and Pause/Break.
- On a Mac - press F13. You can also use the Default Mac combination of Apple + Shift + 3. , although Vrykerion says this can have sync issues so you might get a delay with the capture
- You can bind this to another key in your in-game Keybindings.
- make my UI disappear?
- Press Alt+Z. You can press Alt+Z again or Esc to get it back.
- make my toon's name/names of other players/pets disappear?
- The settings for names are located in the Interface-> Names menu
- Or, use the addon Fubar_NameToggleFu
- You could also use the addon Perfect Screenshot (kindy suggested by Rades) to turn off names and UI and take a screenshot, all bound to one key. Sounds perfect for quick shots!
- take a screenie without my toon in it?
- simply zoom right in until you are "inside" your character's head. This can mean that you are closer to the ground that you would like - it's a lot easier in Northrend and Outlands where you can just take off to get a little higher.
- find my image files after taking a screenshot?
- They are saved into your ..\World of Warcraft\Screenshots folder.
The Rule of Thirds, or, the Golden Mean
One of the guiding principles used by photographers is the rule of thirds. Divide the scene you are going to capture into three parts horizontally, and three parts vertically. Generally speaking, photos are supposed to be more interesting with the subject in one of the four intersection points, rather than in the centre of the shot.

Rule of Thirds - Image from photoinf.com
In fact, it appears that the Rule of Thirds is just cheating slightly. The actual reason we are drawn to such images isn't because of thirds - according to some, it's the Golden Mean that makes things more interesting. This is the naturally occurring spiral shape based on the Fibonacci series, also called the Golden Ratio or the Divine Proportion - which can be approximated by the Rule of Thirds. For more examples of this principle in photography, check out jakegarn.com, and photoinf.com. For just plain number-geekiness, check out here or here.
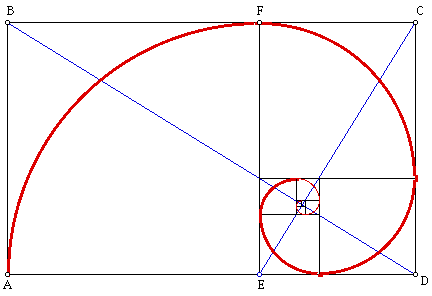
The Golden Mean - Image from http://manolofood.com/ratio/
Here's an example. In this shot I put the subject, the Tauren lady walking away, in the right side of the image. The eye is drawn to the heart above her head (well, mine is anyway).


Of course rules are there to be broken and you may end up with some amazing results, but it's something to keep in mind when you're lining up your next shot.
Framing the shot
No, this isn't about hanging your screenie on the wall. Framing your shot can make it more visually striking and put into context where you are taking the screenie from. For example, you could frame your shot with an overhanging branch, the trunk of a tree, a doorway or window (although this can be difficult in WoW due to the auto-zooming camera positioning).
You could also place a small object in the foreground as a focal point - flowers, shrubs, a mailbox, a gnome...
This waterfall in Azshara looked really big up close but it's a bit hard to tell where it is.

From a little further back, I used the foreground and trees to frame the waterfall. It looks more like Azshara now. You may prefer the first shot - it's difficult for me to say which I like better. Perhaps it's because I didn't have any gnomes handy.

Character shots
The WoW camera angles limit our choices for taking portrait shots of our own characters, and there are only so many poses toons can make, but there are a few things we can control.
- Lighting is a major factor - many zones do not have a lot of ambient light, especially at night (well, duh). Inside buildings is usually your best bet for casting light on your character, and for neutral backgrounds.
- Try to zoom in as much as you can while still getting the composition you are after - if you need to crop or resize later it means you have the best resolution to play with.
The shot on the left was taken at night outside, so it's a little dark.The shot on the right was inside Undercity, and is still a bit dark, but there is light cast on Leesah's face.
 |  |
You can always use some post-process cropping trickery to edit shots of your own characters too.

Now you're getting tricky
Plenty of principles of visual arts such as painting and photography also apply to creating images in-game. Things like the use of symmetry, contrasting colours, odd angles and converging lines lead your eyes into an image and make it more interesting. As always, practice and experimentation is key!
Roads make great converging lines.

Take Many Shots!
Many professional photographers will spend hours waiting for the perfect shot, taking thousands of photos just to capture the perfect one. Obviously we don't want to sit in game setting up a screenshot for hours - in fact sometimes you only have seconds to jump on your screenshot button before the moment passes. If, however, you have a few moments to set up a shot, make sure you take several. Chances are, when you go back to look at the images later something will be not quite perfect with the image - if you take a load your chances of capturing the perfect shot are increased. This is especially important when including characters of any type in a shot - cities, pets or boss kill shots - character movements tend to be random and unpredictable so take many for best possible results. It took a lot of zooming around and at least 20 screenies to get this kill shot from Eye of Eternity.

In Conclusion
The best advice I can give about taking screenshots is to take as many as you can. Practice makes perfect! Make sure to take a look at them later and remember what works for you and what doesn't. You can use all the techniques in the world, but if it doesn't look good to you, then change something until it does.
Also remember that any visual art - paintings, photos, films or screenshots - is very subjective and what looks awesome to you might be discarded on the cutting room floor by the next person. Work out what works for you, and run with it.
Please leave a comment and add your top tips for taking screenshots! Where did you take your favourite/most beautiful one, and why do you think it works?
A selection of sites where there are always awesome screenshots:
- http://ostensiblywow.blogspot.com/
- http://view-through-branches.com/
- http://jadedalt.wordpress.com/
- http://fallingleavesandwings.wordpress.com
Some Free Photography Resources:
